Generate schedules
List your courses and see every conflict-free week, ranked by what you care about.
When should I use Generate schedules?
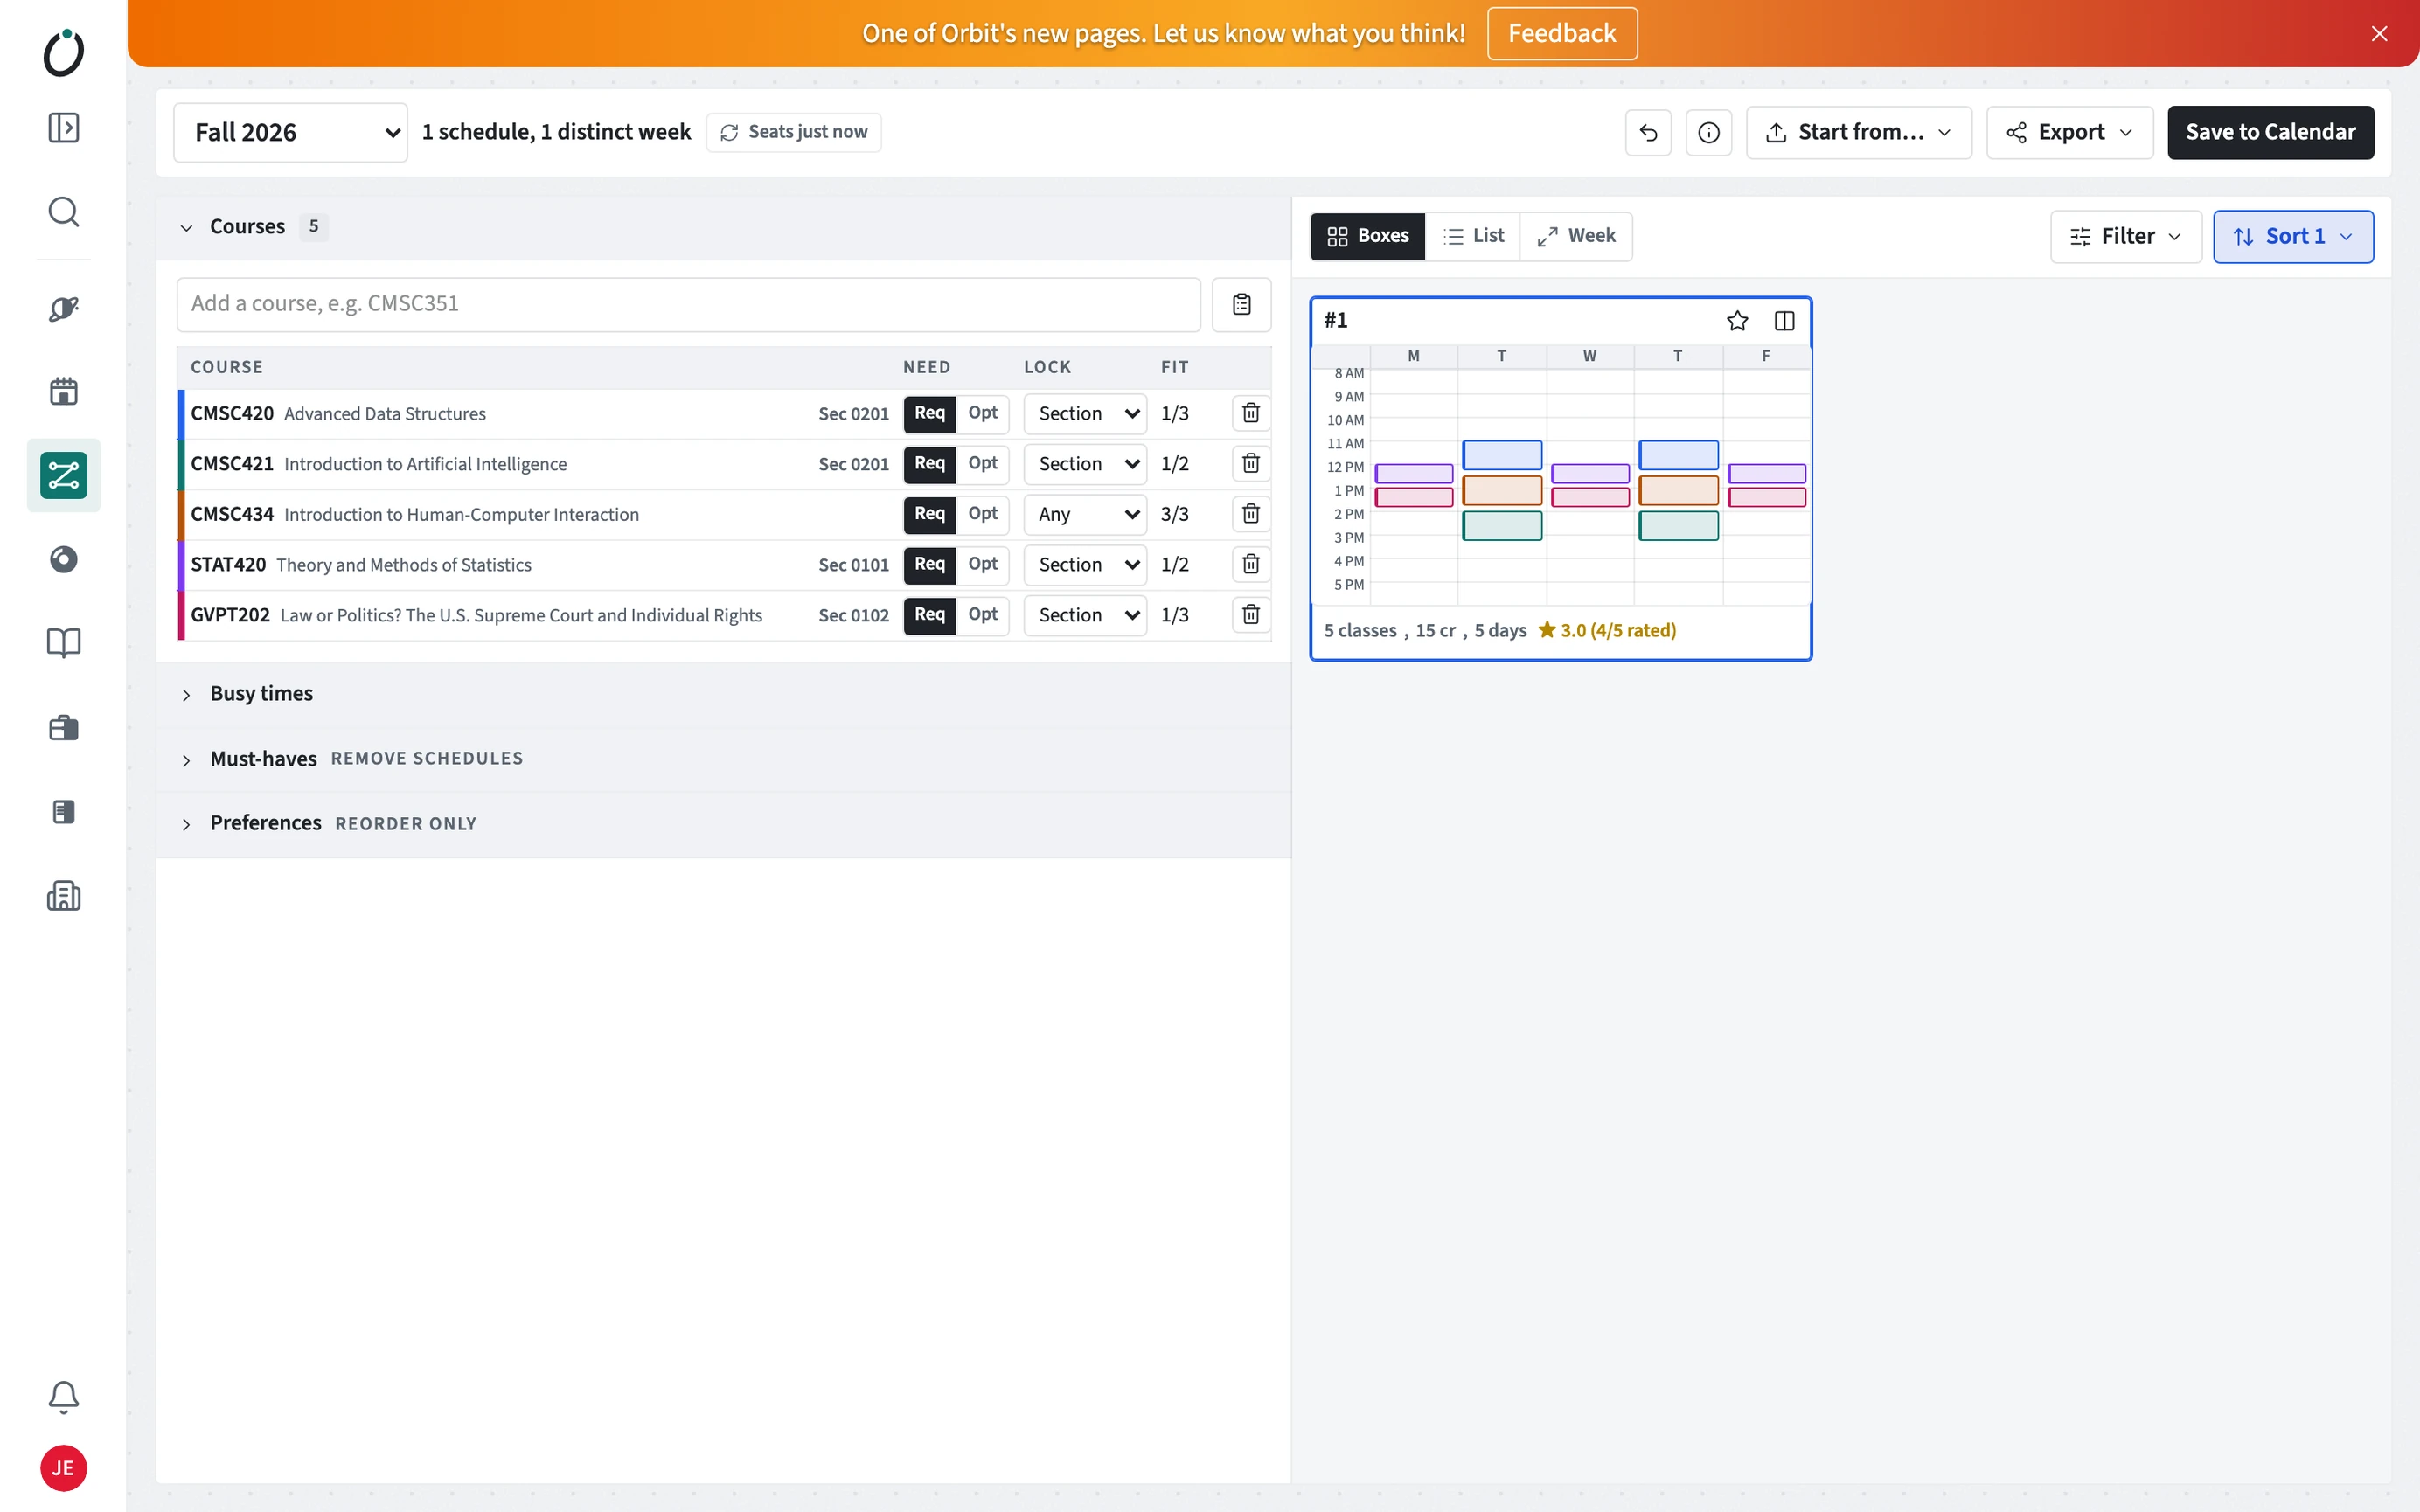
Use it when you know which courses you need and want Orbit to find every combination of sections that fits. Results update as you edit; there is no Generate button.
- Open Generate schedules under Plan, then pick the term.
- Add courses by search, Import from my plan, Paste a list, or Start from a saved schedule.
- Mark each course Required or Optional, and lock a section or professor if you have already chosen.
- Add busy times for work, practice, or a commute.
- Use Must-haves to remove schedules and Preferences to reorder them.
- Star favorites, compare them, then Save to Calendar or Export.
What if nothing fits?
Orbit lists the single changes that bring schedules back, with how many each would add. Each course row also shows how many of its sections still match and what is filtering out the rest.
How do I take a schedule to registration?
Export has a registration cheat sheet with every course, section, professor, and time, plus a backup section for anything close to full. Export can also add classes to Google Calendar or Outlook, download an .ics file, print, or make a share link.